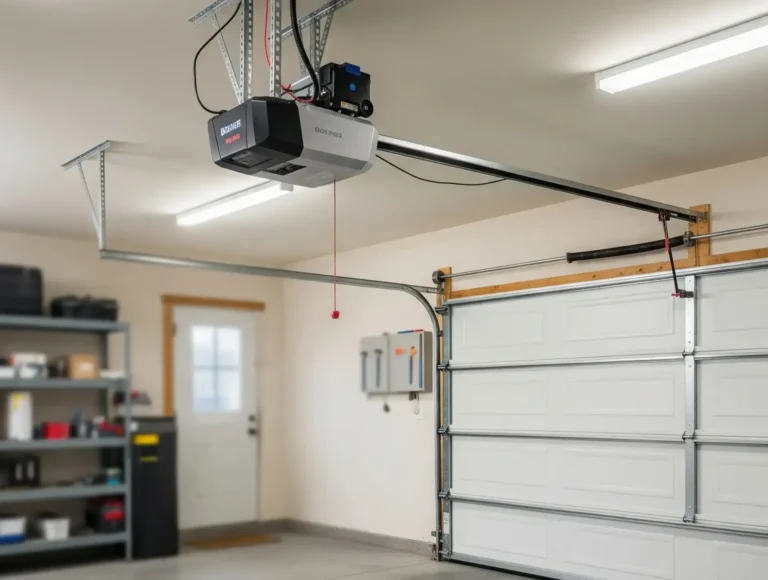
So, you did it. You wrestled with that greasy chain, consulted a guide on garage door chain repair, and successfully reattached it to the opener. That moment of triumph when the links click back into place is a great feeling for any homeowner.
But before you plug the opener back in and hit the button, there’s one critical step that separates a quick fix from a lasting solution: setting the correct chain tension.
Getting this adjustment right is the difference between your door gliding smoothly for years and hearing that dreaded slap-slap-slap of a loose chain against the rail, or worse, causing premature wear on your opener’s motor. This guide picks up right where reattachment leaves off, showing you exactly how to dial in the perfect tension for safe, quiet, and reliable operation.
Step-by-Step Guide to Adjusting Garage Door Opener Chain Tension
Published: Jun 2, 2026 | Updated: Jul 28, 2026
Before You Begin: The Essentials for a Safe Adjustment
Adjusting your opener chain is one of the safest and most common maintenance tasks you can perform. But like any project, starting with a solid foundation of knowledge is key.
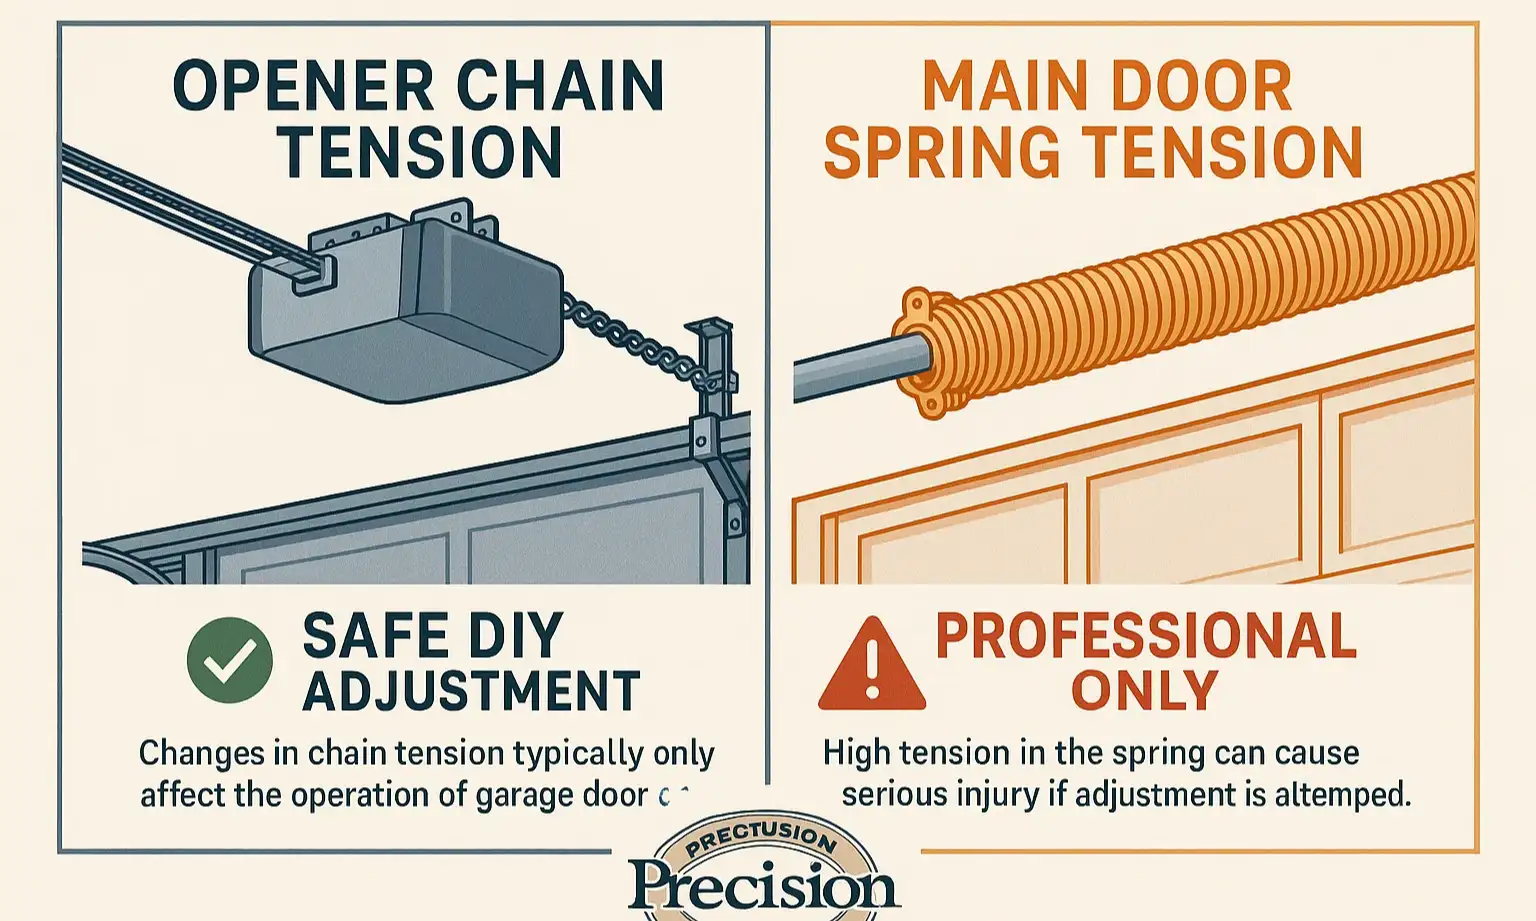
Chain Tension vs. Spring Tension (The Difference That Can Save You!)
First, let’s clear up a common and potentially dangerous point of confusion. The chain you are adjusting is part of the opener mechanism that pulls the door. Adjusting it is a low-risk task. This is completely different from the high-tension door springs (either torsion or extension springs) that actually lift the door’s weight.
Understanding this distinction is the most important safety lesson in garage door maintenance.
What is Correct Chain Tension? The “Goldilocks” Zone
Here’s the “aha moment” for most people: the goal isn’t to make the chain guitar-string tight. In fact, an over-tightened chain is just as bad as a loose one, as it puts immense strain on the opener’s motor and sprockets.
The perfect garage door chain tension has a slight amount of slack. The industry standard, recommended by major manufacturers like Chamberlain, is for the chain to sit approximately 1/4 to 1/2 inch above the base of the rail at its midpoint. This “Goldilocks” zone allows the chain to move freely without slapping or binding.
Gather Your Tools
You don’t need a massive toolbox for this job. Confidence comes from having the right tools ready.
That’s it. Now you’re ready.
The Step-by-Step Adjustment Process
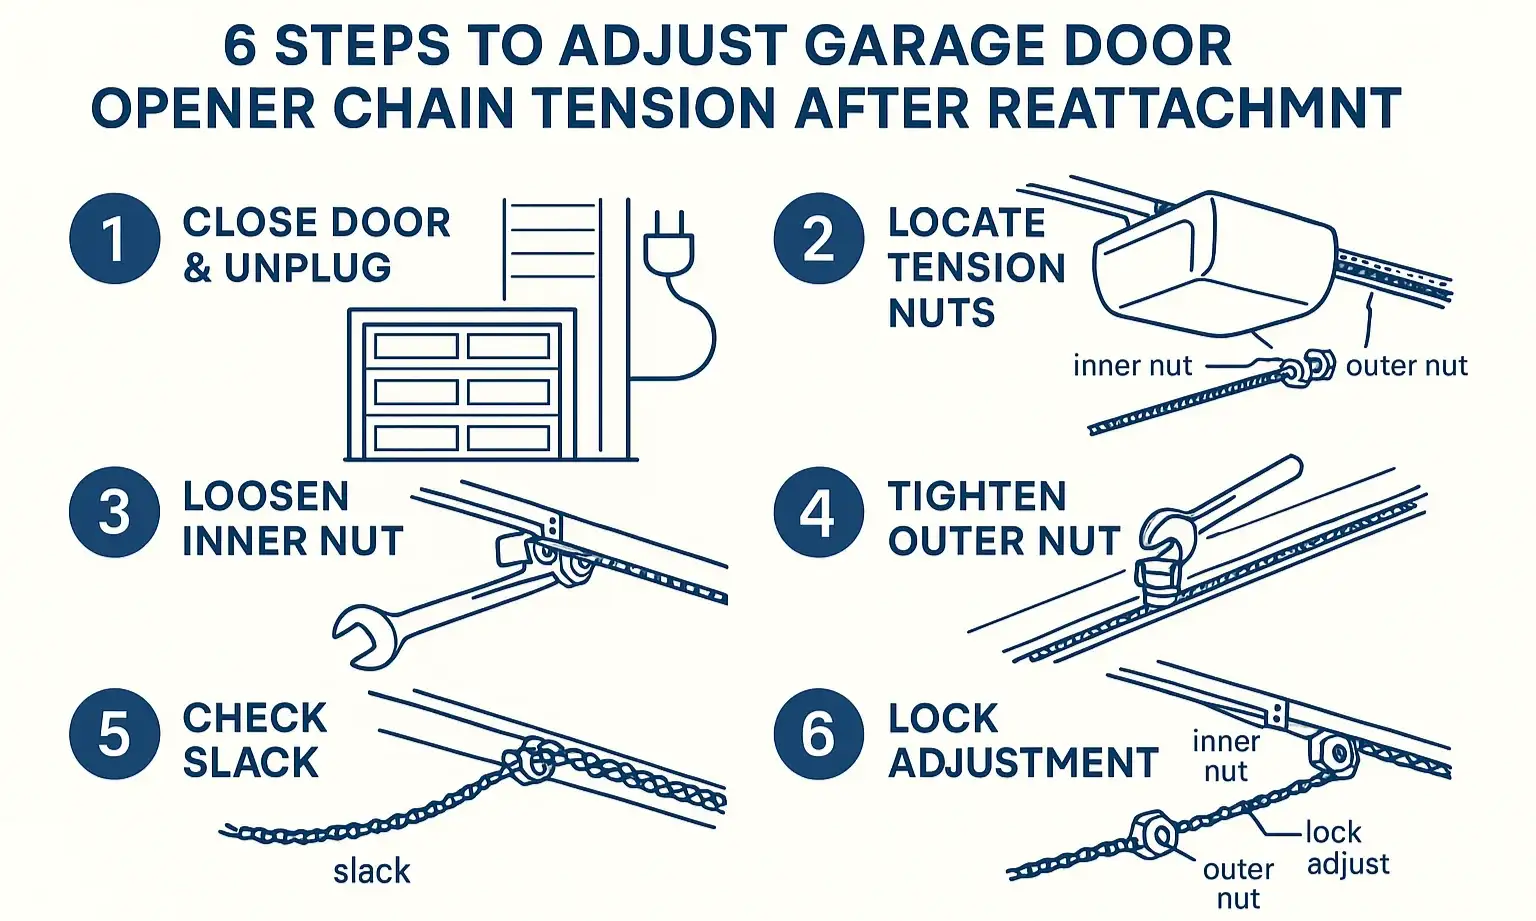
With your tools in hand and a clear understanding of the goal, follow these simple steps to dial in your chain tension perfectly.
Step 1: Close the Garage Door & Unplug the Opener
Always start with the garage door in the fully closed position. This releases the tension from the chain. For safety, unplug the garage door opener from the power outlet.
Step 2: Locate the Tensioning Nuts
On your stepladder, find the trolley—the mechanism that moves along the rail and is attached to the door arm. You will see a threaded bolt with two nuts on it, located where the chain connects to the trolley.
Step 3: Loosen the Inner Nut
Using one wrench, hold the outer nut (the one furthest from the door) in place. With your second wrench, turn the inner nut (closest to the door) one or two turns counter-clockwise to loosen it. This “unlocks” the bolt, allowing you to make adjustments.
Step 4: Tighten the Outer Nut to Raise the Chain
Now, use one wrench to turn the outer nut clockwise. As you tighten it, you will see the chain lift and the slack decrease. Turn it in small increments—about a half-turn at a time.
Progress Checkpoint: After each half-turn, pause and check the tension at the midpoint of the rail. Is it getting close to that 1/4 to 1/2 inch gap? This prevents you from over-tightening.
Step 5: Check for Perfect Tension
Continue with small adjustments until the chain is sitting in that “Goldilocks” zone. It should be straight but not rigid. You should be able to move it slightly with your fingers.
Step 6: Lock in the Adjustment
Once you’ve achieved the perfect tension, hold the outer nut stationary with one wrench. Use your other wrench to tighten the inner nut clockwise until it is snug against the outer nut. This locks your adjustment in place.
⚠️ Mistake Alert: Do not overtighten these two nuts against each other. Making them snug is all that’s needed to prevent the bolt from loosening over time.
Troubleshooting and FAQs: Your Questions Answered
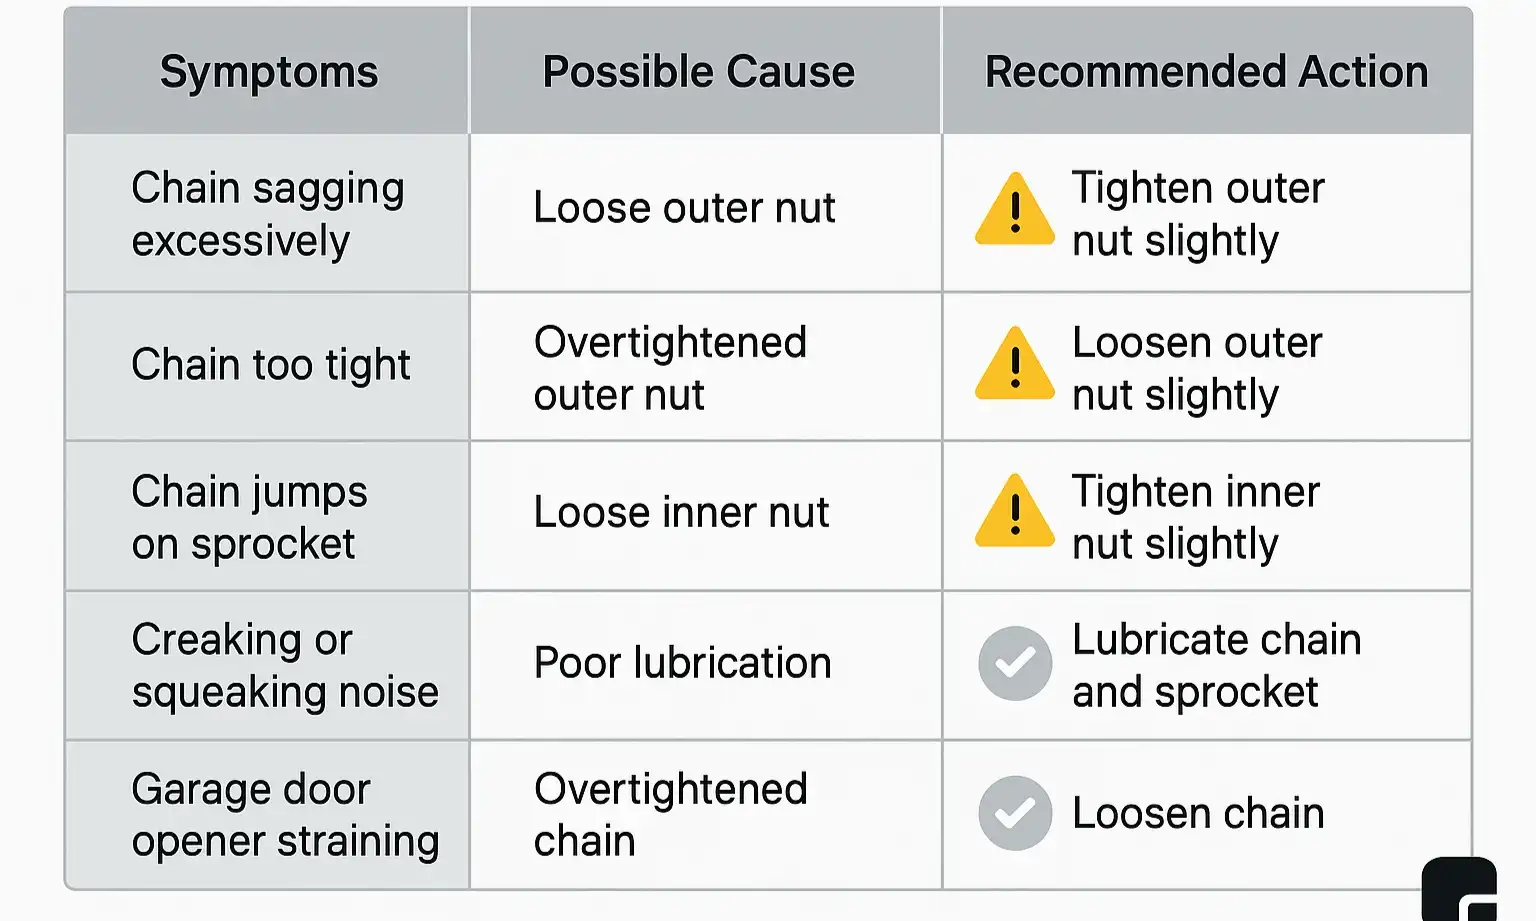
Even a straightforward process can have its quirks. Here are answers to common questions that come up during a chain adjustment.
What happens if my garage door chain is too loose?
A saggy, garage door chain loose can cause a slapping noise, jerky door movement, and can even skip a gear on the sprocket or fall off completely.
What are the risks of making the chain too tight?
An over-tightened chain is a silent killer for your opener. It puts constant strain on the motor’s output shaft and gears, leading to premature wear and a costly replacement down the line.
Do you adjust the chain with the garage door open or closed?
Always, always, always adjust the chain with the door fully closed. This ensures there is no load on the opener, giving you an accurate feel for the true slack.
My garage door is off chain. Why did it happen?
A chain can fall off for a few reasons, but the most common are incorrect tension (too loose) or a problem with the master link that connects the chain ends. Regularly checking tension prevents this.
Is it necessary to lubricate garage door chain components during this process?
Absolutely. While you’re up there, it’s the perfect time to apply a high-quality lubricant designed for garage door chains. This reduces friction and noise, extending the life of your entire system.
Is this adjustment the same as when I need to adjust garage door travel or force?
No, this is a separate mechanical adjustment. If your door isn’t closing all the way or reverses unexpectedly, you may need to adjust garage door opener settings like travel and force limits, which are usually controlled by dials or buttons on the motor unit itself.
The Final Check: Testing Your Work
With the tension set and the nuts locked, it’s time for the moment of truth.
If the door operates smoothly and quietly, congratulations! You have successfully completed a crucial piece of home maintenance, ensuring your garage door opener will serve you well for years to come.
If you’ve followed these steps and something still doesn’t seem right, don’t hesitate. Sometimes a persistent issue points to a more complex problem. For professional advice and service in Connecticut, the experienced technicians at 24H Garage Doors are always ready to help ensure your door is safe and reliable.
If you’ve followed these steps and something still doesn’t seem right, don’t hesitate. Sometimes a persistent issue points to a more complex problem. For professional advice and service in Connecticut, the experienced technicians at 24H Garage Doors are always ready to help ensure your door is safe and reliable.
Frequently Asked Questions
What happens if my garage door chain is too loose?
A saggy, garage door chain loose can cause a slapping noise, jerky door movement, and can even skip a gear on the sprocket or fall off completely.
What are the risks of making the chain too tight?
An over-tightened chain is a silent killer for your opener. It puts constant strain on the motor's output shaft and gears, leading to premature wear and a costly replacement down the line.
Do you adjust the chain with the garage door open or closed?
Always, always, always adjust the chain with the door fully closed. This ensures there is no load on the opener, giving you an accurate feel for the true slack.
My garage door is off chain. Why did it happen?
A chain can fall off for a few reasons, but the most common are incorrect tension (too loose) or a problem with the master link that connects the chain ends. Regularly checking tension prevents this.
Is it necessary to lubricate garage door chain components during this process?
Absolutely. While you're up there, it's the perfect time to apply a high-quality lubricant designed for garage door chains. This reduces friction and noise, extending the life of your entire system.
Is this adjustment the same as when I need to adjust garage door travel or force?
No, this is a separate mechanical adjustment. If your door isn't closing all the way or reverses unexpectedly, you may need to adjust garage door opener settings like travel and force limits, which are usually controlled by dials or buttons on the motor unit itself.