Installing a new garage door opener may sound like a big job, especially if you’ve never done it before, but it’s easier than many people think. Whether you’re upgrading your old system or starting from scratch, 24H Garage Doors makes it easy to understand what it takes to get the job done right. If you’re wondering how to install a garage door opener, this guide covers the basics step by step. We’ll walk through tools, mounting, wiring, and even keypad installation.
How to Install a Garage Door Opener: A Complete Guide for Homeowners
Published: Jul 3, 2025 | Updated: Jul 28, 2026
How Hard Is It to Install a Garage Door Opener by Yourself
Let’s start with the big question: how hard is it to install a garage door opener on your own? The answer depends on your comfort with basic tools and following instructions. For many homeowners, it’s a doable weekend project — especially if the existing wiring and brackets are still usable.
Here’s what you’ll likely need:
Here’s what you’ll likely need:
You’ll also want to have your garage door opener kit ready, which should include the rail, motor unit, sensors, remote, and mounting parts. If your ceiling is high or the joists don’t align well, a support bracket may be necessary.
Still, if things feel too complex at any point, a professional garage door opener installation can save time and frustration — and that’s something 24H Garage Doors can always help with. Check out our service page if you’d rather leave it to the pros.
Still, if things feel too complex at any point, a professional garage door opener installation can save time and frustration — and that’s something 24H Garage Doors can always help with. Check out our service page if you’d rather leave it to the pros.
How to Mount a Garage Door Opener and Set It Up: Step-by-Step Breakdown
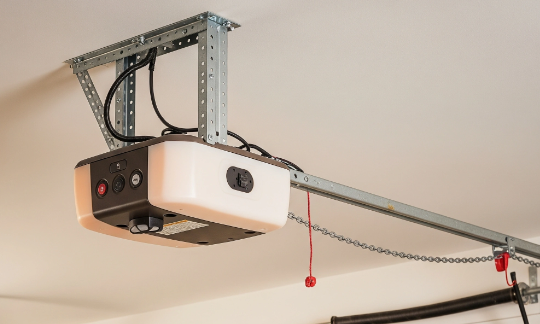
If you’ve still chosen the DIY route after weighing your options, here’s how to install a new garage door opener in a few clear steps — from mounting the rail to wiring the system.
How to Install a Garage Door Opener Keypad for Easy Entry
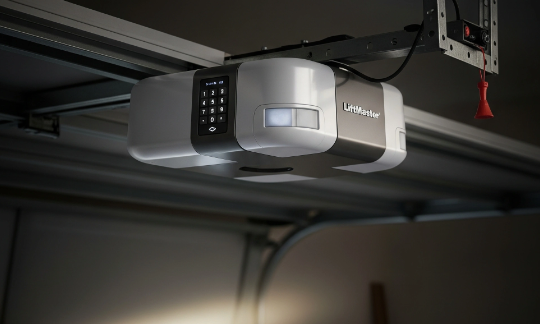
Many homeowners also want to know how to install a garage door opener keypad to allow keyless entry. This step is optional but very useful.
Here’s how to do it:
If you’re also adding a new remote, check out our guide on how to program a garage door remote — it walks you through each step to make sure the remote syncs properly with your opener.
Wrapping Up
So, now that you know how to install a garage door opener — from mounting and wiring to keypad syncing — you’re in a good place to decide if a DIY install is right for you.
Still, every garage is different, and in some cases, it’s easier (and safer) to let a professional do it. 24H Garage Doors offers fast, affordable installations for all opener models. Whether your current system is outdated or you’re installing a unit in a newly built garage, we’ve got you covered with reliable service that fits your schedule. Contact us today to book a visit or get honest advice tailored to your setup.
Still, every garage is different, and in some cases, it’s easier (and safer) to let a professional do it. 24H Garage Doors offers fast, affordable installations for all opener models. Whether your current system is outdated or you’re installing a unit in a newly built garage, we’ve got you covered with reliable service that fits your schedule. Contact us today to book a visit or get honest advice tailored to your setup.
Frequently Asked Questions
Is installing a garage door opener something I can realistically do myself?
For many homeowners it's a doable weekend project, and how hard it is depends on your comfort with basic tools and following instructions. It's especially manageable if the existing wiring and brackets are still usable. That said, if things feel too complex at any point, a professional installation can save time and frustration.
What tools and parts should I have ready before I start?
You'll likely need a power drill with bits, wrenches or a socket set, a ladder and safety glasses, a stud finder or level, a tape measure, and a helper for lifting the motor. You should also have your opener kit ready, which typically includes the rail, motor unit, sensors, remote, and mounting parts. If your ceiling is high or the joists don't align well, a support bracket may be necessary.
How is the motor unit actually mounted during installation?
After assembling the rail and sliding in the trolley, you connect it securely to the motor unit according to your kit's instructions. To hang the motor, locate the ceiling joists and use lag screws to mount it, double-checking the position with a level and keeping all bolts tight. Mounting it safely really matters at this step.
Where do the safety sensors go when setting up the opener?
Position the safety sensors about 5 inches off the ground, facing each other across the door opening. A solid LED light on both sensors means they're aligned properly. After that, you connect the opener to a power source and follow the manual to wire the sensors and wall control, then test the unit.